Beginning Knifemaking – Guide to Forging Knives
This is a step by step tutorial that shows you how to forge a knife. By forging I mean that you take a piece of steel and you shape and form it in the forge and on the anvil.
If you don’t have a forge and an anvil you can still make an excellent knife. I do have a tutorial for that. It is called the Stock Removal method of knife making and you use common tools to shape and form your knife. Here is the tutorial for that: Make a knife using the stock removal method
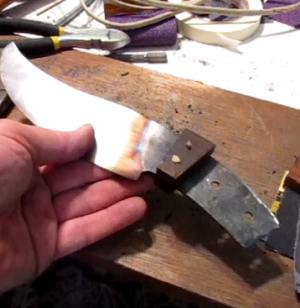
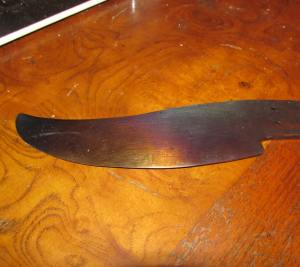
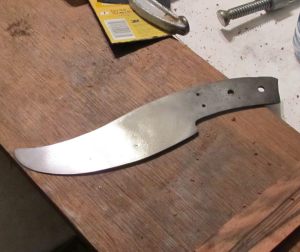
Here is the knife that I make in this tutorial. I take you all the way through the whole process from beginning to end.
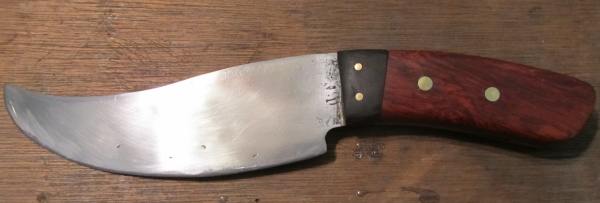
It is eleven inches in length. This knife is a little more in depth compared to my first knife making project. For example, this one has a curved blade and curved handle; and it also uses brass pins rather than wooden dowels. I also use a two piece handle which has an ebony bolster (darker section is this bolster) and a mahogany handle. But the biggest thing about this knife is that we forge it in the fire and work it on the anvil.
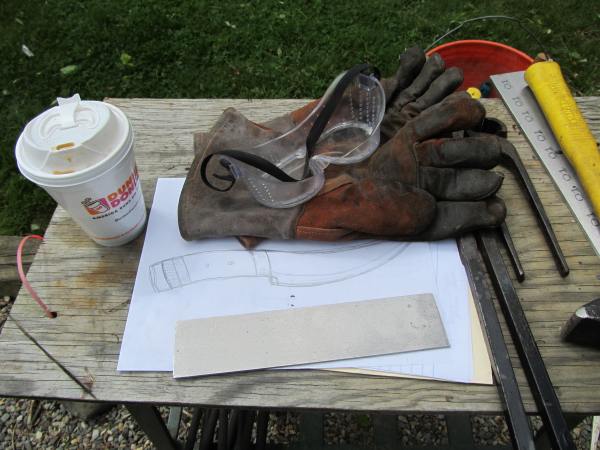
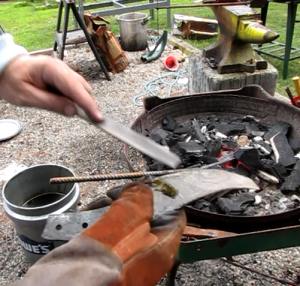
The following picture shows a couple of things I want to point out before starting. The most important thing is to know the shape you are going to make your knife! Gotta have a plan! I figure this out by doing some drawings. In this picture you see the final drawing of the knife I want to make. It is to scale. It is the size of the actual knife to be made.
You can also see the piece of 01 steel that I am using to make the knife. Well, we have to go from that piece of steel to the knife in the drawing so let’s get started! (But, make sure you have a cup of the best coffee in the world. (shown in the left of the pic)
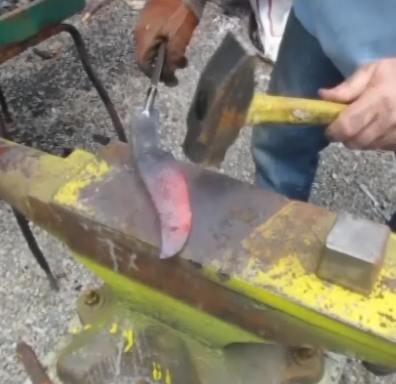
There are two major challenges when it comes to making a knife like this. If you want to make a plain and straight knife it is pretty easy but this one has some pretty serious curves on it. The blade curves up and the handle curves down. So we will have to address this on the anvil. And there is a very big difference in drop between the blade and the handle. This drop is called the choil and there is a very specific technique we use to get this drop.
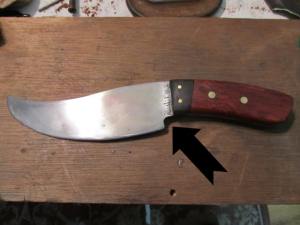
This picture shows that drop that I am talking about. I will show you the smithing technique for easily getting this drop in the knife.
Let’s get started
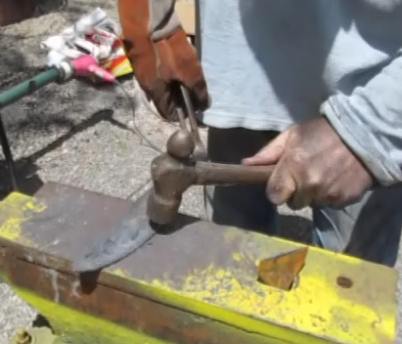
This next picture shows how you will be doing a lot of work on this soon to be knife. You will be hammering on the side of it like this. And this brings up a couple of points.
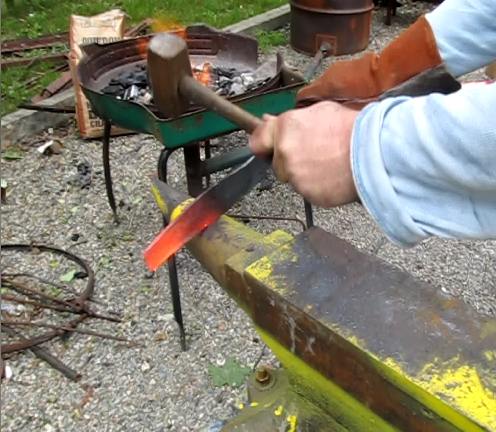
When you hammer on the side of a piece of metal like this you are doing something called “upsetting the metal” This is squashing the metal down. And it causes the metal to become thicker around the edges. The center of the piece of metal stays the same thickness but all around the edges it gets thicker.
You have to continuously work this by hammering on the edge like this then laying the piece down flat on the anvil and flattening it out.
But the most important thing I show with this picture is the offset hammering I am doing. I am striking the knife a little to the left. Not directly above the horn of the anvil. This offset striking causes the whole piece to slowly bend. And this is how we get our curve.
Remember that it isn’t just the side of the hammering that is affected. The side against the anvil also is worked on at the same time.
So this is what you do, continuously work the piece to get the curves you want. Use the surface of the anvil and the horn of the anvil.
Now the Drop Choil
Okie, I talked about that big drop in the knife between the blade and the handle. So how do we do that?
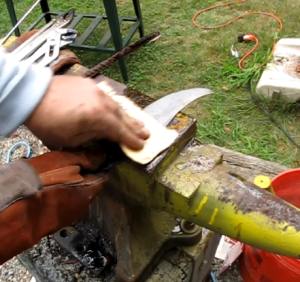
Well, start that shape early on. Don’t finish curving the blade then do this! start this very early. You could even do this before you start the curving. This is called Half-face hammering. You put the knife half way off the anvil. The edge of the anvil is where you want the drop choil to be. And in the case of this knife the blade part is hanging off the anvil. The handle part is on the anvil.
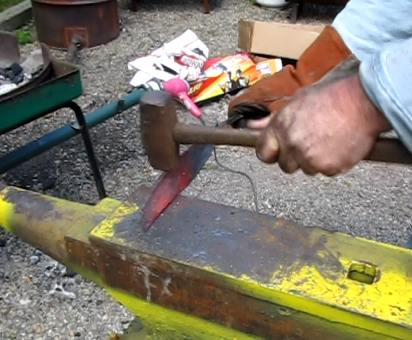
And you strike the piece just as shown. This causes a very distinct drop in the knife. The blade end will stay the same size but the handle half (on top of the anvil) will compress.
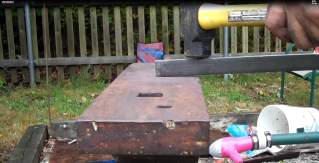
This next picture shows a better angle of half face hammering. It isn’t the knife, just a piece of steel. But with this picture you can see how the hammer blows would cause the metal to compress over the anvil and not compress the part hanging over.
So that is the major process for creating the shape of the knife. Continue using these techniques to get the knife as close to the final configuration as you can. We still have more to do however. So lets continue on with the tutorial.
Ok, continue to work the shape and size of the knife. Using the various techniques like offsett hammering on the horn and half face hammering on the flat surface.
Also be sure to continuously flatten the blade so you don’t get the thicker sections around the edges. This is just a matter of hammering flat on the anvil.
The tip of the blade
One thing I want to note is that you should spend only a little bit of time on the tip of the blade, particularly if it is thin or very curved like this one. Save the final work on the tip for the very end of the forging session. When the metal is very thin or small as in the tip it is very easy to burn or melt it in the forge or to hammer it away. So don’t work the tip much. Just get it to rough shape and thicker than desired until the end of your session. Then finish it off.
And as we are moving toward finishing off the knife and the work is getting more detailed I will switch to a smaller hammer. It gives me more control and I get more precise work done. This is something to consider. Especially as you are moving on to beveling the blade and finalizing the tip of the knife.
And one more thing is that as you shape the blade you will probably have some excess material. It will get larger than you want! You can remove this by hot cutting with a tool in the hardy hole.
Continue working the knife until you get it very close to the final shape.
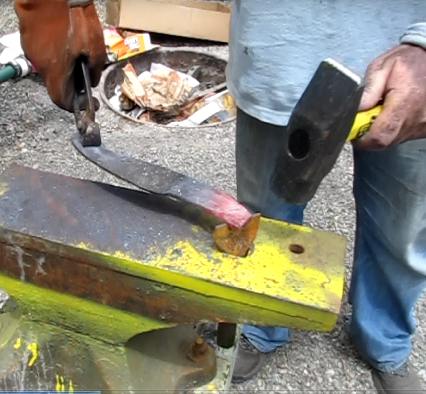
Then you should start working the blade so it tapers down to the cutting edge. This is a beveling of the blade.
You can just bevel a part of the blade edge or you can bevel the whole blade.
Beveling the blade
Once you have this knife pretty close to final shape you should start beveling the blade. This is a matter of hammering the blade on both sides in a way to thin it out toward the edge that will be sharpened.
Try a few techniques like laying it flat and hitting it with angled and glancing blows, or by tilting it slightly while hammering it.
At this point you are pushing the steel up toward the spine of the blade. You want to form a nice wedge shape that comes to a point at the blade edge.
Once you have it to final shape
Now it is time to anneal the knife. This is the process of softening it up so you can continue to work on it with hand tools, files, grinders, sand paper and other things.
Annealing
This is the process of heating the whole knife up to Curie temperature where it is red orange and no longer is attracted by a magnet. So heat it up and check it with a magnet. Once the magnet no longer sticks to it at all it is at the right temperature and you can slowly cool it down. You can do this by pulling it away from the fire in increments or by submersing it totally in sand.
Allow it to cool at its own pace and once it’s cooled we can continue to work on it. Now we don’t need the forge, we move into the workshop to do most of the finish work.
We will crank up the forge one more time though in order to harden and temper it.
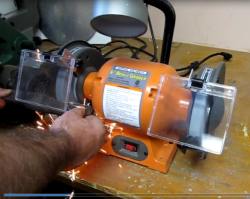
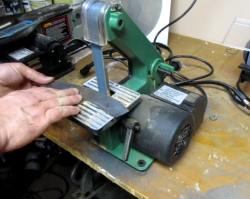
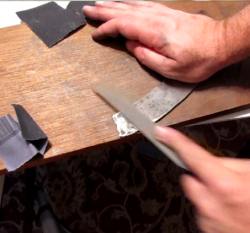
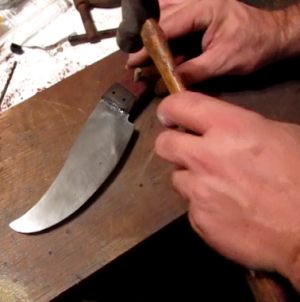
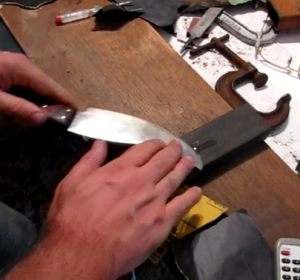
Ok, let’s clean this knife up and get it into shape. Because you annealed it you can work on it. So use whichever tools you have available to clean it and further refine it to it’s final shape. Here are four quick looks at tools you can use: Grinder, Belt sander, File and Emory Paper.
The Handle
Lets take a look at the finished handle so you can understand what I did. You don’t have to make a handle like this though. If you want an easier handle you can check out my tutorial on making a knife by the stock removal method. That has a simpler handle.
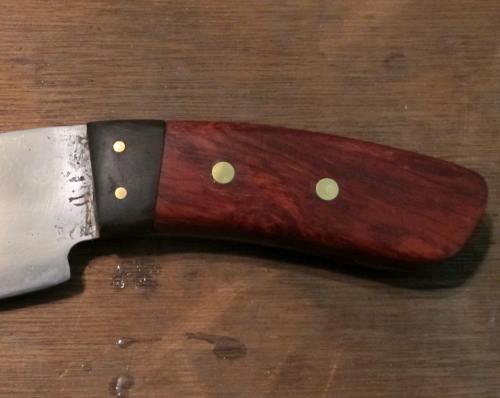
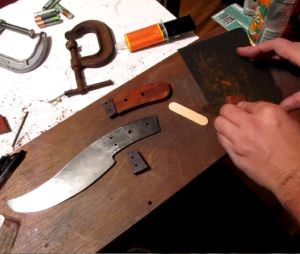
Here is a closeup look at the knife handle I make in this tutorial. This is how we will do it.
The handle itself is made of two different parts: the bolster which is the dark wood and the handle which is the lighter wood.
There is of course actually four pieces of wood because on the other side of the handle you have these two pieces again.
These four pieces of wood are glued in place and pinned by brass rods.
The brass rods in the bolster are 1/16 inch and in the handle they are 1/8 inch.
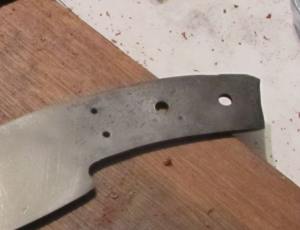
Now we need to drill some holes in the handle. And this will of course depend on how you want to make your handle. I have drilled four holes in mine. Two holes are 1/16 of an inch and these are for the bolster. Two holes are 1/8 inch and these are for the actual handle.
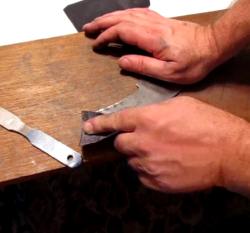
Now using the knife itself as a template you drill holes into pieces of wood that are rough cut to the approximate size of the bolster and handle pieces. Then attach them to the knife with wooden dowels. You don’t want them to be pinned permanently. You just want a temporary pinning.

This picture shows the rough handle installed onto the knife. All four pieces are installed and we are ready to shape this handle to its final shape.
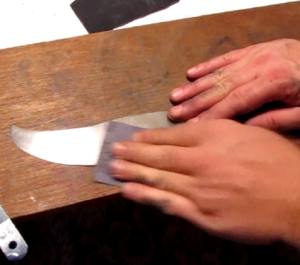
Now use some tools to shape the handle and bolster to the desired shape and size. A rasp works really well here. You can also get a lot done quickly with a belt sander. As you get down to the details and it is almost done you can switch to sandpaper to get a nice finish on it.
Once it is to the correct shape you can remove the handle and bolster pieces and set them aside.
Now its time to finish off the blade. You grind it with a successive series of emory paper. This is a polishing of the blade to give it a great and smooth look. I start with 100 grit and move through all the grits to 600 in 100 grit increments.
Optionally, once you are done with the emory paper you can buff it on a buffing wheel. Be cautious and safe though, a buffing wheel can be very dangerous. It can grab that knife and fling it at you.
Hardening and Tempering the Blade
Now we need to get this knife ready for action. And that means hardening the steel then softening it up a little bit so it isn’t brittle. This is the process of hardening and tempering.
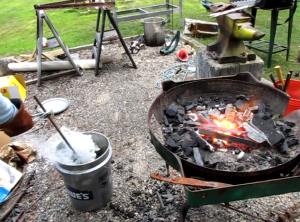
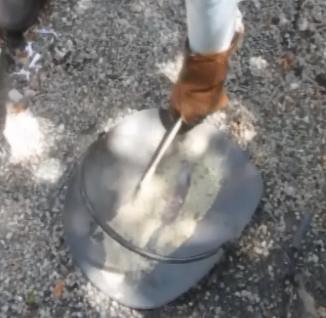
Crank up the forge. You will also need a bucket of oil for this. Any kind of used oil will work. Motor oil, vegetable oil, even transmission fluid is ok.
Crank up the forge and put your knife in it. Also put a long piece of metal in there too. Something like a piece of rebar is what I am using.
As that extra piece gets up to heat take it out of the fire and dip it into your bucket of oil as shown here. This brings up the temperature of the oil. It will make for a better hardening and tempering.
Hardening the blade
Heat the knife, paying particular attention to the blade and point, to red orange. It isn’t so necessary to harden and temper the whole knife. Just the blade is good. Get it to the point where a magnet no longer sticks to it. This is the Curie temperature and once it hits this non stick point you can submerge it totally in the oil. And be sure to swirl it around.
Once it is cooled you can test the hardening with a file. Running a file lightly over it will give a glassy sound. The file rides over it without grabbing at anything. Compare this to sound it makes when filing the butt end where it isn’t so hardened.
Now clean the blade of the knife (both sides) with emory paper or sand paper. Get it pretty clean. We need to see the metal for the next step of tempering.
Tempering the Blade
Before we temper the blade let me show you what you are shooting for. We want to slowly bring up the temperature of the blade (only to about 450-500) and we want the temp higher along the spine of the blade. The spine is the edge that doesn’t cut.
The higher we bring the temp the softer the metal will get. So, we want to soften up the spine a fair amount but soften up the cutting edge just a little.
We do this by watching the color of the steel as it heats up.
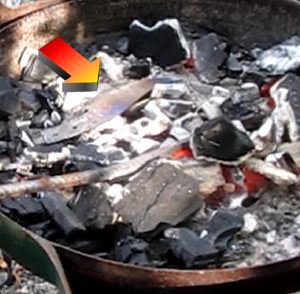
This picture gives you a pretty good idea of what we are shooting for. We want the spine to get to a plum color and the cutting edge to get to wheat color.
We achieve this by putting it near the fire with the back edge closest to the fire.
The arrow shows the knife. And you can see that the spine is facing the fire with the cutting edge facing away. This will heat up the spine first and slowly transmit that heat into the blade.
Monitor it closely and move it around to change the colors as you need it. Once you get it to plum on the back and wheat on the cutting edge dip it in your oil to lock it in.
Finishing The Knife
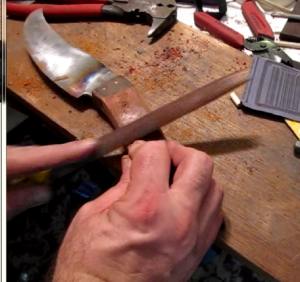
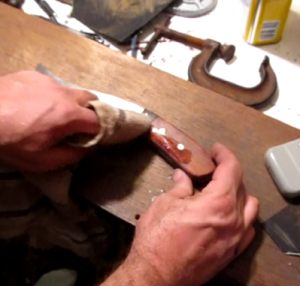
Clean the knife with emory paper. Get it nice and good looking. Next we are going to mount the handle.
Now prepare the handle pieces by roughing up the inner edges on sandpaper or emory paper. These are the edges that will actually glue to the knife.
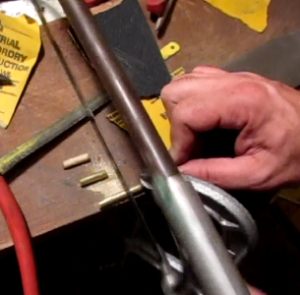
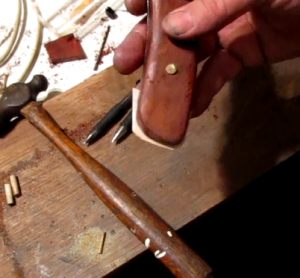
Cut your pins out of brass rod. I used a hacksaw. Use the temporary wooden pins as a guide for how long to cut your brass pins. And make them just a little bit longer. Once these pins are installed in the handle we will file them down.
I cut two 1/8 inch pins and two 1/16 inch pins.
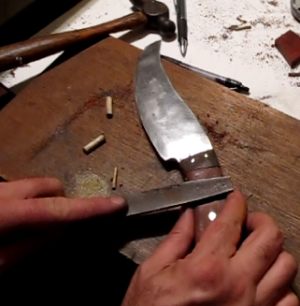
Test fit them in your handle holes and knife holes. You don’t want to struggle with them while everything has wet glue on it.
You can sand them a little bit for an easier fit.
And, I am using brass but you could use wood dowels instead if you prefer.
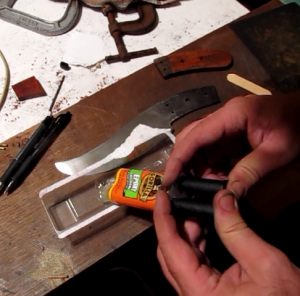
Mix up a two part epoxy glue. I use five minute Gorilla glue. This stuff works great. If you are unsure of the whole process you could use a twenty minute epoxy glue. It will give you more time to tinker with things.
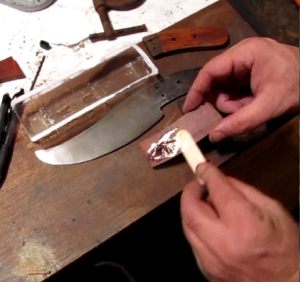
Apply a liberal but even coat of epoxy to all four pieces of handle.
Carefully apply all four pieces to the knife and insert all the pins. Use a small hammer or mallet to tap them in.
Clamp the knife down and let it dry for the recommended period. This two part epoxy recommends 90 minutes for handling and 24 hours for complete cure.
When you clamp it try not to clamp on the pins. Avoid them. This could cause it to not actually clamp.
My wooden handles were a bit bigger than the tang on the knife so I put a small piece of wood in there before I clamped the whole thing down for the glue to dry. If your handle is the same size as your tang you don’t need to do this.
Once the glue has completely set you can clean it up with acetone. Then carefully file down the brass pins with a file. Do this in conjunction with any final shaping of the handle that you want to do.
I did a little work on the belt sander. I also trimmed and sanded down the extra piece of wood I had placed in the handle.
Now polish the handle. There are a few different products you can use but I like the finish that Tung oil creates. Put several coats.
The Completed Knife
Sharpen the blade and your knife is complete!